Friday 21 December 2012

Peanut Butter Balls

Here is a simple, last minute Christmas recipe that will take no effort, but make you look like a pro.

-peanut butter balls-


Ingredients:
1 Cup peanut butter
1 Cup rice krispie cereal
1 Cup powdered sugar
2 Tbsp melted butter
Melting chocolate (Dark/White/Milk it all works)

Blend peanut butter, sugar, and melted butter until well combined. Mix in rice krispies and refrigerate for half an hour.


-adding the crunch-


Roll mixture into balls similar in size (1-2 inch) and place on cookie sheet lined with parchment or wax paper. Place in freezer for half an hour. (Not necessary but easier for dipping)


-similar in size?-


Melt chocolate and drop balls in to coat, remove and place back on parchment paper.
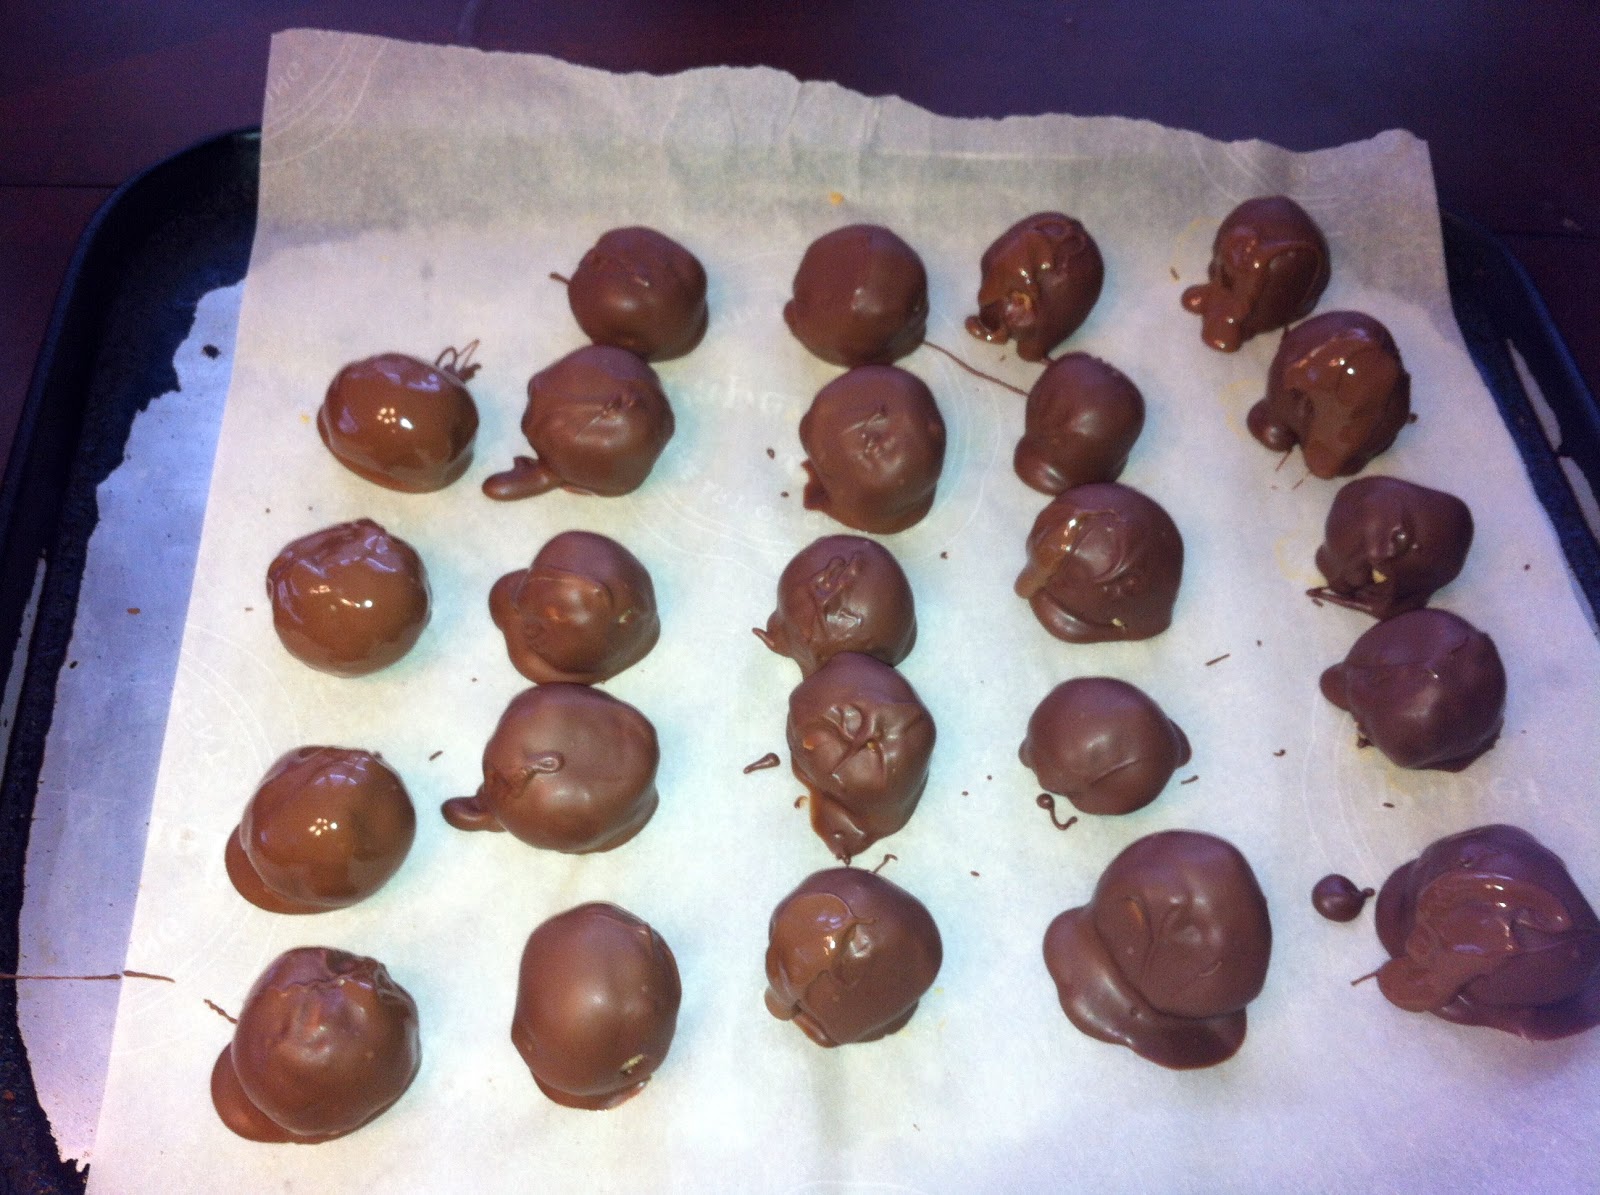


-milk chocolate-


The chocolate will harden in no time even at room temperature. I like to drizzle mine with another type of chocolate just to make them pretty.


-white chocolate drizzle-


These peanut butter balls are smooth, creamy and crunchy. They will impress anyone you bring them to! The recipe easily doubles, and triples because trust me one batch is rarely enough.


-pretty and delicious-

Wednesday 19 December 2012

Bakery Sugar Cookies

One of my favourite cookies are the soft, fluffy sugar cookies that you can only get at the grocery store. A few weeks ago my friend said she was craving them so I started a hunt for a recipe. I made a few changes to the recipe I found here and they came out perfectly! Everyone agreed they were just like the ones 'you can only get in the grocery store!'


-couldn't wait for them to cool before icing!-


Cookies:
2 1/4 cups all-purpose flour
2 1/4 teaspoons baking powder
1/4 teaspoon salt
3/4 cup butter, at room temperature
3/4 cups sugar
2 large eggs
1 Tablespoon vanilla extract

Combine flour, baking powder and salt in bowl. In separate bowl cream sugar and butter together, add eggs and vanilla. Blend in dry ingredients until combined. Refrigerate for 1 hour. 


-dough disks-


After dough has chilled, roll into balls and flatten into disks. Place on parchment paper lined baking sheet. Give them enough space because they will spread.


-still light colour when baked-


Bake at 350 for 9-10 minutes. Cookies should still be light on top and golden on the bottom. DO NOT OVER BAKE!


-bottoms slightly brown-


Let cookies cool on wire rack completely before icing...if you have the patience.


Icing:
2 cups confectioners’ sugar
4 Tablespoons butter, melted
1 tablespoon vanilla extract
3-4 tablespoons milk (plus more, as needed)

Wisk together in a bowl until you get the right consistency. Add food colouring and spread (or spoon) onto cookies.

-icing will be liquid until it sets-
I promise these simple cookies will be a huge hit! My friends left my house with the extras stashed in their pockets.


Monday 10 December 2012

Beach Bum

This post may seem a little unseasonal to some of you, but if you are going away this winter, or if you want to save this idea until the sun comes out again, this is a great DIY! I get a lot of great deals online shopping, but sometimes the sizes aren't quite right. I had bought 3 pairs of bikini bottoms that were a little too big, and I didn't want to pay the shipping to exchange them, so I found another solution.


-too big!-


I love the 'puckered' or 'ruched' butt bikini bottoms, so transforming my own bikini was perfect! You can do this with bottoms that fit, it will just make them a little cheekier. (haha)


-bikini and thread-


Chose a thread colour that matches the bikini well! You don't want a strange coloured line down the back of your bottoms. Strong thread, or elastic thread works best.


-line to follow-


Turn the bottoms inside out and draw a dashed line down the centre with a pencil. (Rulers help!)


-simple stitch-


Starting on the inside, about an inch from the top, begin stitching. The further apart the stitches, the more 'puckered' it will be at the end.


-follow the line-


Continue stitching as far down as you want the pucker. This part takes a bit of trial and error.


-the scrunch-


Pull the thread before tying off to get the 'scrunched' effect. Again the tighter you pull it, the more 'scrunched' it will be.


-thread is less visible when they are on-


Try them on and see how you like them! The stitch can easily be taken out, and if you make a mistake you can try again. Even a non-sewer can do this!


-beach ready-


This little trick will give you a butt lift without having to do 1000 squats.

Monday 3 December 2012

Jello Shots!

It's a little embarrassing to admit, but almost any birthday or celebration with my group of friends involves Jello Shots. We have been making them since we first started drinking, and through trial and error we have come up with the most effective recipe.


-jello shooters-


For every box of Jello, you will need 1 cup of alcohol and about 20 plastic shot glasses. I normally use vodka for my mix but you can try other types of alcohol too. (Sour Puss works really well)


-supplies-


The directions on the Jello says to use 1 cup of hot water, and 1 cup of cold. Instead of the cold water use room temperature alcohol. Mix together until powder is completely dissolved.


-lime jello and vodka-


Pour the mixture into plastic shot glasses that have been sprayed with cooking spray. Spraying the glasses is super important to prevent the Jello from sticking!


-greased glasses-


Let them set in the fridge like regular Jello and enjoy! 


Monday 19 November 2012

Magnetic Nails

I paint my nails often, but usually lack the motivation and artistic talent to do any sort of design. At a recent sale at a salon I found this magnetic nail polish and had to give it a try.


-Nabi Blueberry Magnetic Nail Polish-


You simply paint a (thick) coat on a nail and then hold the magnetic cap over it for 15-30 seconds. I also suggest painting a base coat of colour and letting it dry first. Try to hold the cap as close as possible (without touching nail.) There are magnetic pigments in the nail polish so when the magnet is held over it, those pigments pull forward, leaving a line.


-holding magnet over nail-


Each cap also has a unique design so you can try stripes, arrows and waves.


-got a little too close to my nails-


Another tip for any time you are waiting for your nails to dry, spray them lightly with PAM cooking spray. It prevents them from staying tacky and getting ruined!


-PAM cooking spray-


Magnetic nail polish is a great way to add a subtle design to your nails if you are artistically challenged!

Monday 12 November 2012

Snow Brownies

In honour of the first snowfall of the year this weekend I decided to share this recipe for Snow Brownies. A friend of mine asked for white chocolate brownies for her birthday. I'm not a big white chocolate fan, but I thought it could be a nice seasonal spin on the classic chocolate brownies. This is what I came up with:


-snow brownies-


I made a few changes to this recipe and (with the addition of macadamia nuts) it just may have changed my opinion on white chocolate...


-white chocolate chunks-


Snow Brownies:
1/2 C butter
2 ounces white chocolate
2 eggs
1 C white sugar
1 tsp vanilla
1 C all purpose flour
1/2 tsp salt
1/2 C macadamia nuts, chopped


-macadamia nuts-


Beat eggs, sugar, and vanilla in mixing bowl. In another dish melt butter and white chocolate together (I used the microwave). Combine butter mixture with egg mixture, then stir in flour and salt until combined. DO NOT OVER MIX.


-batter-


Stir in macadamia nuts and pour into greased 9X9 inch pan. Top with flakes of white chocolate, and bake at 350C for 20-25 minutes.


-before-


Let cool for at least 15 minutes before cutting into squares.


-snow brownies-


With golden brown edges and a chewy middle they are the perfect winter treat!

Monday 29 October 2012

Witch Fingers

In anticipation for Halloween on Wednesday, I decided to share this cookie recipe with you. My mom used to make these cookies every year, and my brother once refused to bring them to a school Halloween party because he thought they were so creepy.


-witch fingers-


Witch Fingers:
1C butter
1C icing sugar
1 egg
1tsp almond extract
1tsp vanilla
2-3/4C all purpose flour
1tsp baking powder
1tsp salt
whole blanched almonds (one for each cookie)
1 tube red decorating gel


-ingredients-


Beat together butter, sugar, egg, vanilla and almond extract. Beat in flour, salt and baking powder. Cover and refrigerate for 30 minutes.


-ready for the oven-


Roll spoonfulls of dough into finger shapes. Press almond firmly into the end of each finger for the nail. Use a knife to slash lines for knuckles. Bake at 325C on a parchment lined baking sheet for 15-20 minutes.


-slightly golden-


Let cool for 3 minutes before lifting up almond and squeezing decorating gel into nail bed. Press almond back into shape. Let cool on cookie rack. (When not working with dough keep refrigerated)


-witch fingers-


These cookies have a subtle almond flavour and are not overly sweet, like so many other Halloween treats are. They are perfectly creepy and appetising! Happy Halloween!!